
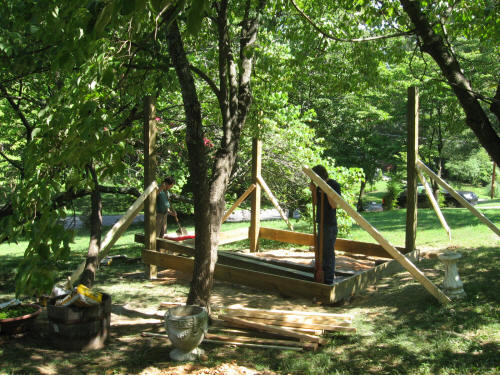
Removing soil and setting posts
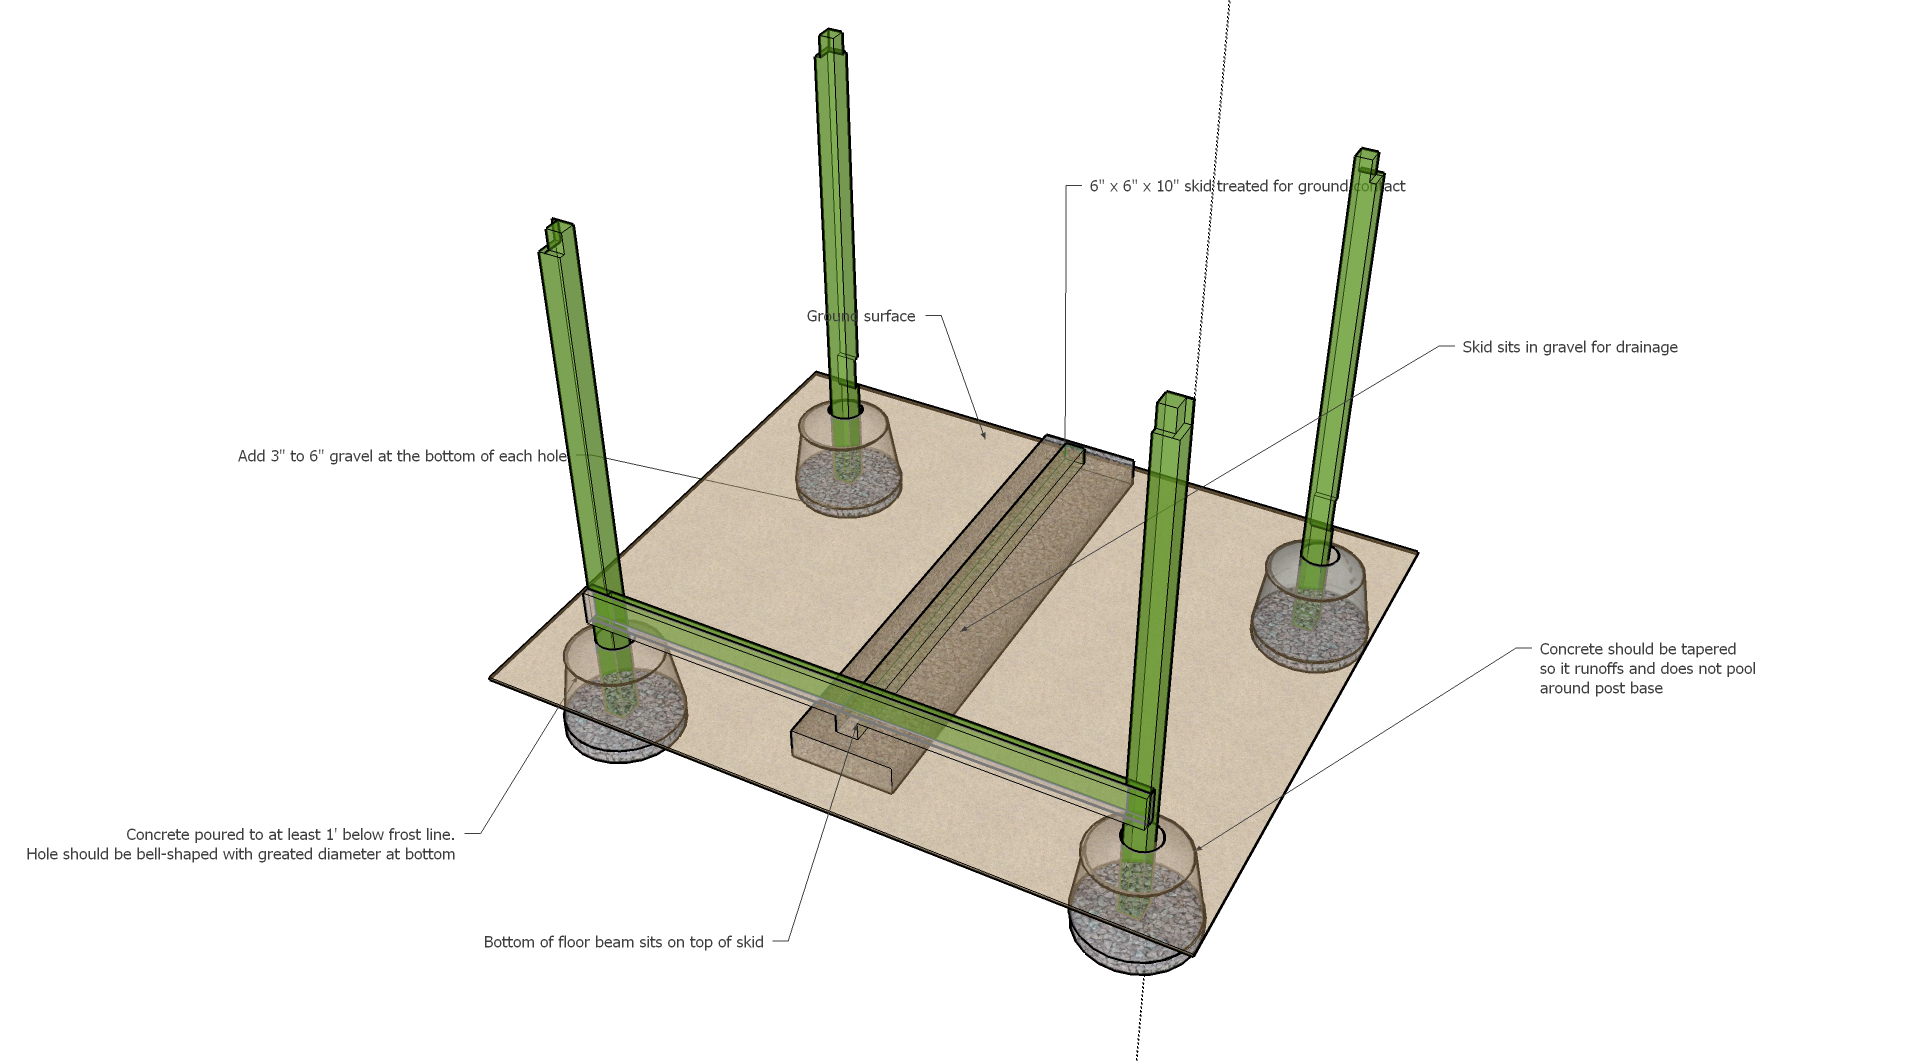
My gazebo plans required preparation of a 10' x 12' area, with four 6' x 6' posts buried and set in concrete. I also laid a 6'' x 6' x 10" "skid" across the 10' to add support to the perpendicular 12' spans.
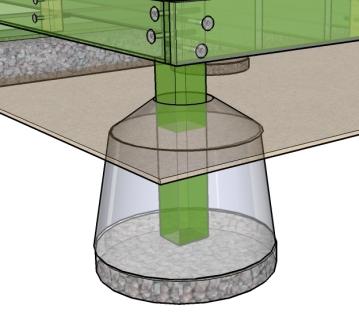
Footings and foundations. Even if your site if level, you will have to dig for your footing or piers. A regular shovel is not a good tool for this since you want your holes to be slightly flared at the bottom compared to the top:
A better tool is the clamshell or post-hold digger. If you are working with tough ground or have to good deep, a power auger from the local rental store might be worth it. We actually started off with the power auger, but it seemed a bit hard to control and didn't give us the precision on the hold size that manual digging did. But they are not too expensive, so you might consider it.
Your building plan have been approved by the local code department (if required) so you know the number and size of your posts and how far apart they should be spaced. Before you have your plans approved, you need to find out whether you are required or allowed to set your posts below grade into concrete or attached to a fastener anchored onto a concrete pier.
In addition to the load of your structure, the frostline in your region will determine the dimensions of your footer or pier. In northern climes, that could be several feet. In my neck of the woods, the frost line is about a foot or so, a much easier task. As mentioned earlier, the method you use may be determined by local codes.
I had a choice in my area so I researched the topic extensively, under discussions with the title of "to bury or not bury", and the like. Traditionally posts were buried in concrete to add sturdiness to the structure, but the development of good anchoring hardware has led to techniques to that allow the post to sit on top of a concrete pier, fastened by metal post brackets. The use of adjustable post anchors and fast setting concrete makes this an appealing construction choice. Metal post bases or brackets are not immune to decay from the elements, but you can see how much easier they would be replace than a post buried in concrete.
Post Setting
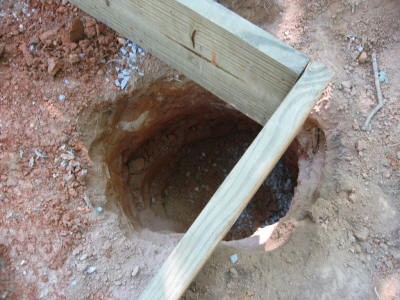
Since our approved plan called for setting the posts in concrete, I constructed a temporary square of floor beams that represented the dimensions into which my posts would be set. You should also take into account notching, which I didn't. These boards can be nailed together temporarily and kept in square by a couple of 2" x 4" across two opposite corners. This served as a guide for marking the location of where the holds would be dug, and to position the corner posts after they were dug. The top picture gives you a rough idea of how this works. You want to end up with the corner post sitting in the center of the hole with an equal amount of concrete around it. This picture shows the idea, although the hole size and corner location are not up to the mark:
After my inspector said my post holes were okay, my son and I set the corner poles in each hole and roughly positioned them using cross braces made out of 2" x 4" 's. A good guide to setting posts in concrete is at Acme Do it Yourself. Like everything else, there's more to digging a hole and putting a post in it then meets the eye.
Before you pour the concrete, you want to measure and remeasure your post locations. This means you will might have to reset the cross braces but its absolutely essential. Take some time because everything is connected to these four pieces of wood or something connected to them. Use diagonal measurements to ensure squareness and get a post leveler like the one below to make sure your posts are exactly straight up and down. Make sure you understand how the floor beams will meet at the corners, taking the notching into account (see the notching discussion in the next section).
Don't forget to measure the height of your posts after they are set into the holes. Your ceiling can't start higher than the top of the shortest post. This is particularly important on posts in the lower end of a sloped area.
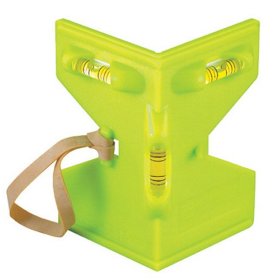
Post leveler.
Skid or Span Tables
Your floor beams or ledgers can span a certain distance between poles without requiring intermediate support. This is a function of the weight and traffic on your structure (relatively light compared to a multistory house, heavier than a deck because of the roof). It also depends on the size of the beams (I used two 2x12 treated southern pine) and the size of your floor joist boards and how closely they are spaced. Many local ordinances will have span tables that describe this distances, like this one or this one:
With 16 inches spacing of my 2x12 joists, my 2 x 12 beams should comfortably span the 12 foot length of my floor, but what about the extra weight of the structure with the roof? If I were an engineer, I could spend a few hours working this one out. If you would like to try, start here.
I decided to be conservative and dig small trench for a "skid" to support the 12 foot span midway. The skid is a 6'x6' treated southern pine timber a little over 10 feet long, so that the floor beams will rest on between the corner posts on the 12 foot side of the gazebo. To keep the rot factor down, I filled the trench with about six inches of gravel for drainage and tamped it down with the end of a short post before placing the skid.
A great article about foundations for sheds etc. that also talks about skids is available at the Fine Homebuilding website. Skids are kind of old school, so you might find an alternative foundation there.
Now you're ready for beams and floors...